
Blog
How to Teach Alphabet Writing to Kids at Home

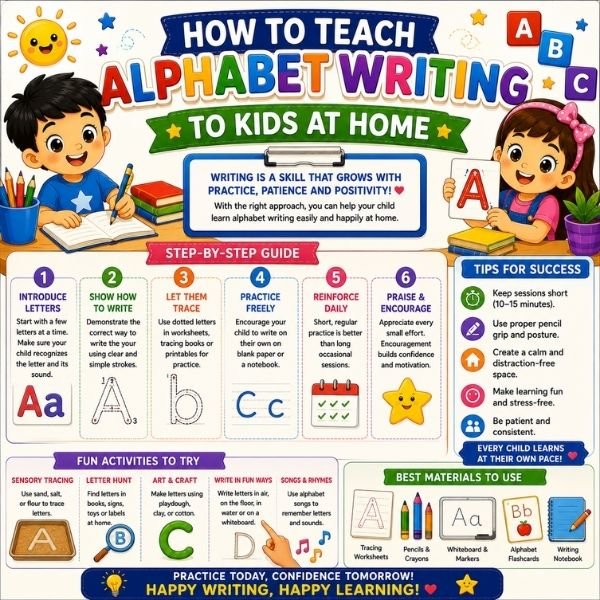
Learning to write the alphabet is one of the biggest early milestones for young children, and it takes more than just handing them a pencil. Letter writing involves fine motor skills, hand-eye coordination, and lots of patient practice.
In this guide, we will walk you through a simple, proven way to teach alphabet writing to your child at home, step by step.
Before Writing: Build Fine Motor Skills First
Before a child can form letters neatly, their hand muscles need to be ready. Activities like playing with clay, using tongs to pick up small objects, and colouring within lines all build the finger strength and control needed for writing.
How to Teach Alphabet Writing — Step by Step
Step 1: Start With Pencil Grip
Show your child the tripod grip — holding the pencil between the thumb, index, and middle finger. Chunky triangular crayons or pencil grips can help younger children get comfortable with this early on.
Step 2: Begin With Large Movements
Before paper, let your child trace big letters in the air, on a sand tray, or with chalk on the floor. Large arm movements build the motion memory needed for smaller, precise writing later.
Step 3: Use Dotted-Line Tracing
Once ready for paper, start with dotted-line tracing worksheets. Tracing over guided dots teaches correct letter formation and stroke direction before your child writes independently.
Step 4: Teach Correct Stroke Order
Show your child the correct starting point and direction for each letter — for example, starting ‘A’ from the top point and coming down on both sides. Consistent stroke order prevents bad habits from forming.
Step 5: Practice One Letter at a Time
Focus on 2 to 3 letters per week rather than the whole alphabet at once. Repetition on a small set of letters builds much stronger muscle memory than rushing through all 26.
Step 6: Move to Independent Writing
Once a letter feels comfortable with tracing, ask your child to write it without guides, first next to a model letter, then completely on their own.
Fun Ways to Practice Alphabet Writing at Home
- Sand or Rice Tray Writing — let your child trace letters with a finger in a tray of sand or rice
- Chalk on the Floor — big, playful letters using floor chalk outdoors
- Playdough Letters — roll playdough into letter shapes to reinforce form
- Sky Writing — trace giant letters in the air using a whole arm movement
- Alphabet Tracing Worksheets — structured daily practice on paper
Common Mistakes Parents Make
- Starting paper writing before fine motor skills are ready
- Introducing too many letters at once instead of a focused few
- Not correcting stroke direction early, which leads to bad habits later
- Expecting neat handwriting too soon — progress takes consistent weeks of practice
At What Age Should Kids Start Writing Letters?
In most Indian school curricula (CBSE and ICSE), children typically begin alphabet writing around age 4 to 5, in nursery or LKG, starting with tracing and moving to independent writing by UKG or Grade 1.
Practice Resources
Support your child’s alphabet writing practice with these free printable worksheets:
- Alphabet Tracing A to Z — Dotted-line tracing for every letter
- Capital Letters Worksheet — Focused uppercase letter practice
- Alphabet Tracing Worksheet A to Z — Extra tracing activity practice
FAQ
Start with fine motor activities, then move to large air or sand tracing, followed by dotted-line worksheets, and finally independent writing — one or two letters at a time.
Most children begin alphabet writing around age 4 to 5, typically in nursery or LKG, once basic fine motor skills are developed.
The tripod grip — holding the pencil between the thumb, index, and middle finger — is the standard correct grip for handwriting.
Focus on just 2 to 3 letters per week rather than the whole alphabet at once, to build strong muscle memory.
Handwriting takes consistent weeks of practice to become neat. Focus on correct stroke direction and grip rather than speed, and progress will follow naturally